Advanced Editor Introduction
Welcome! I’m excited to see you’re interested in learning more about the Advanced Editor! Let’s get started!
What is the Advanced Editor?
The advanced editor is the most powerful way to create Flows in the AeroKick Bot. It allows you to create Flows that are much more complex than what you can create with the Basic Editor. However, with great power comes great responsibility. The Advanced Editor is much more complex than the Basic Editor, and as such it is recommended that you have a (very) basic understanding of programming concepts before using it. This is obviously not a requirement, but it will make things much easier for you. Regardless, if you do ever get stuck, you can always reach out to us on Discord and we will be happy to help you out!
The differences
The Advanced Editor shares some things with the Basic Editor, but completely changes others. Let’s go over the differences.
The same
The Advanced Editor shares the concept of Triggers with the Basic Editor, the only difference is that they are now on the right side of the screen.
The different
Instead of just a basic response configuration as seen in the Basic Editor, the Advanced Editor allows you to create a list of steps that will be run when the Flow is triggered. These steps can be anything from sending a message to chat, doing math, or even making a request to an external API. The possibilities are (nearly) endless!
The Advanced Editor
Let’s take a look at the Advanced Editor, and go over each section.
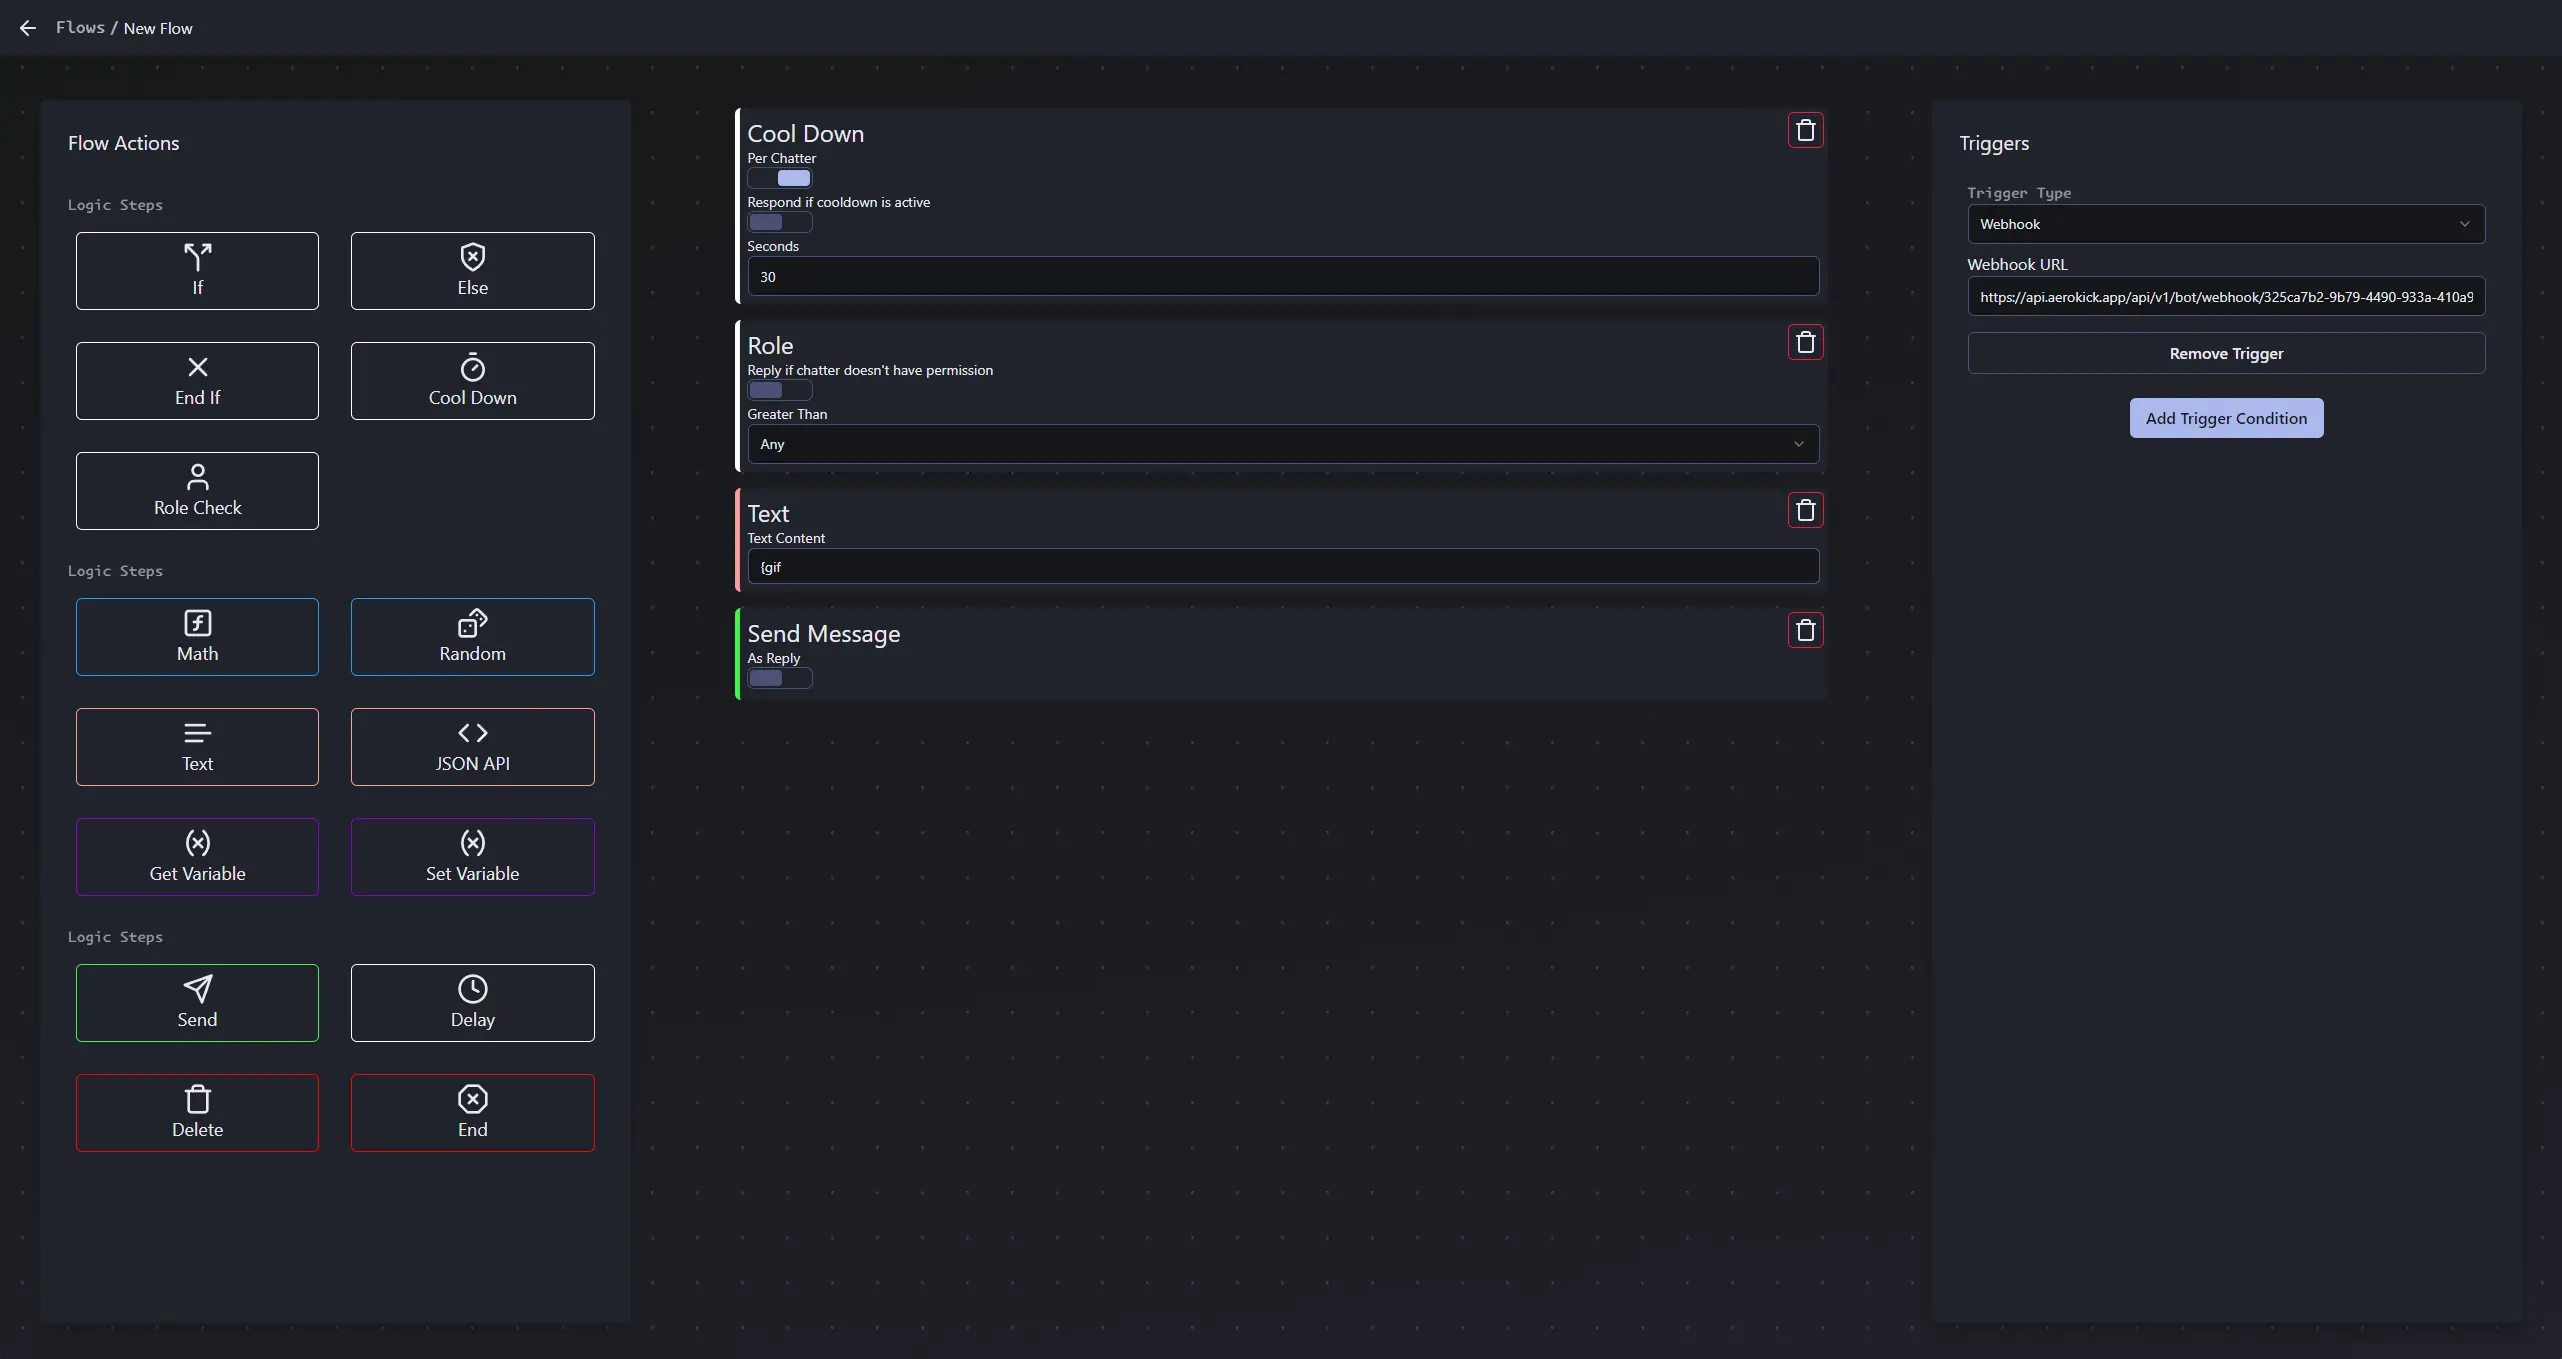 The Advanced Editor is broken up into 3 sections, from left to right they are:
 The Library, Steps, and Triggers. Let’s go over them.
The Library
The Library is where you will find all the available Step Types that you can add to your Flow. You can add a Step Type to the end of your Flow Steps by clicking on it in the library. You can also drag a Step Type from the library into the Steps section to add it to a specific location in your Flow Steps.
Steps
The Steps section is where you will find all of the Steps that are currently in your Flow. Steps are ran in order from top to bottom, and can be rearranged by dragging them up or down. You can also remove a Step by clicking the Trash button on the upper right corner of the Step. Steps all have their own configurations, which we will go over later. Most steps have an Output that will be used as the Input to the next step, but we’ll go more into detail about that in the next section.
Triggers
The Triggers section is where you will find all of the Triggers that are currently in your Flow. Triggers are what cause your Flow to run, and can be added by clicking the Add Trigger button. There is no difference between the Triggers in the Advanced Editor and the Basic Editor, so if you’re familiar with the Basic Editor, you should be good to go!