The Basic Editor
The Basic Editor is what you will likely be using when creating most Flows, let’s go over it section by section!
Section 1
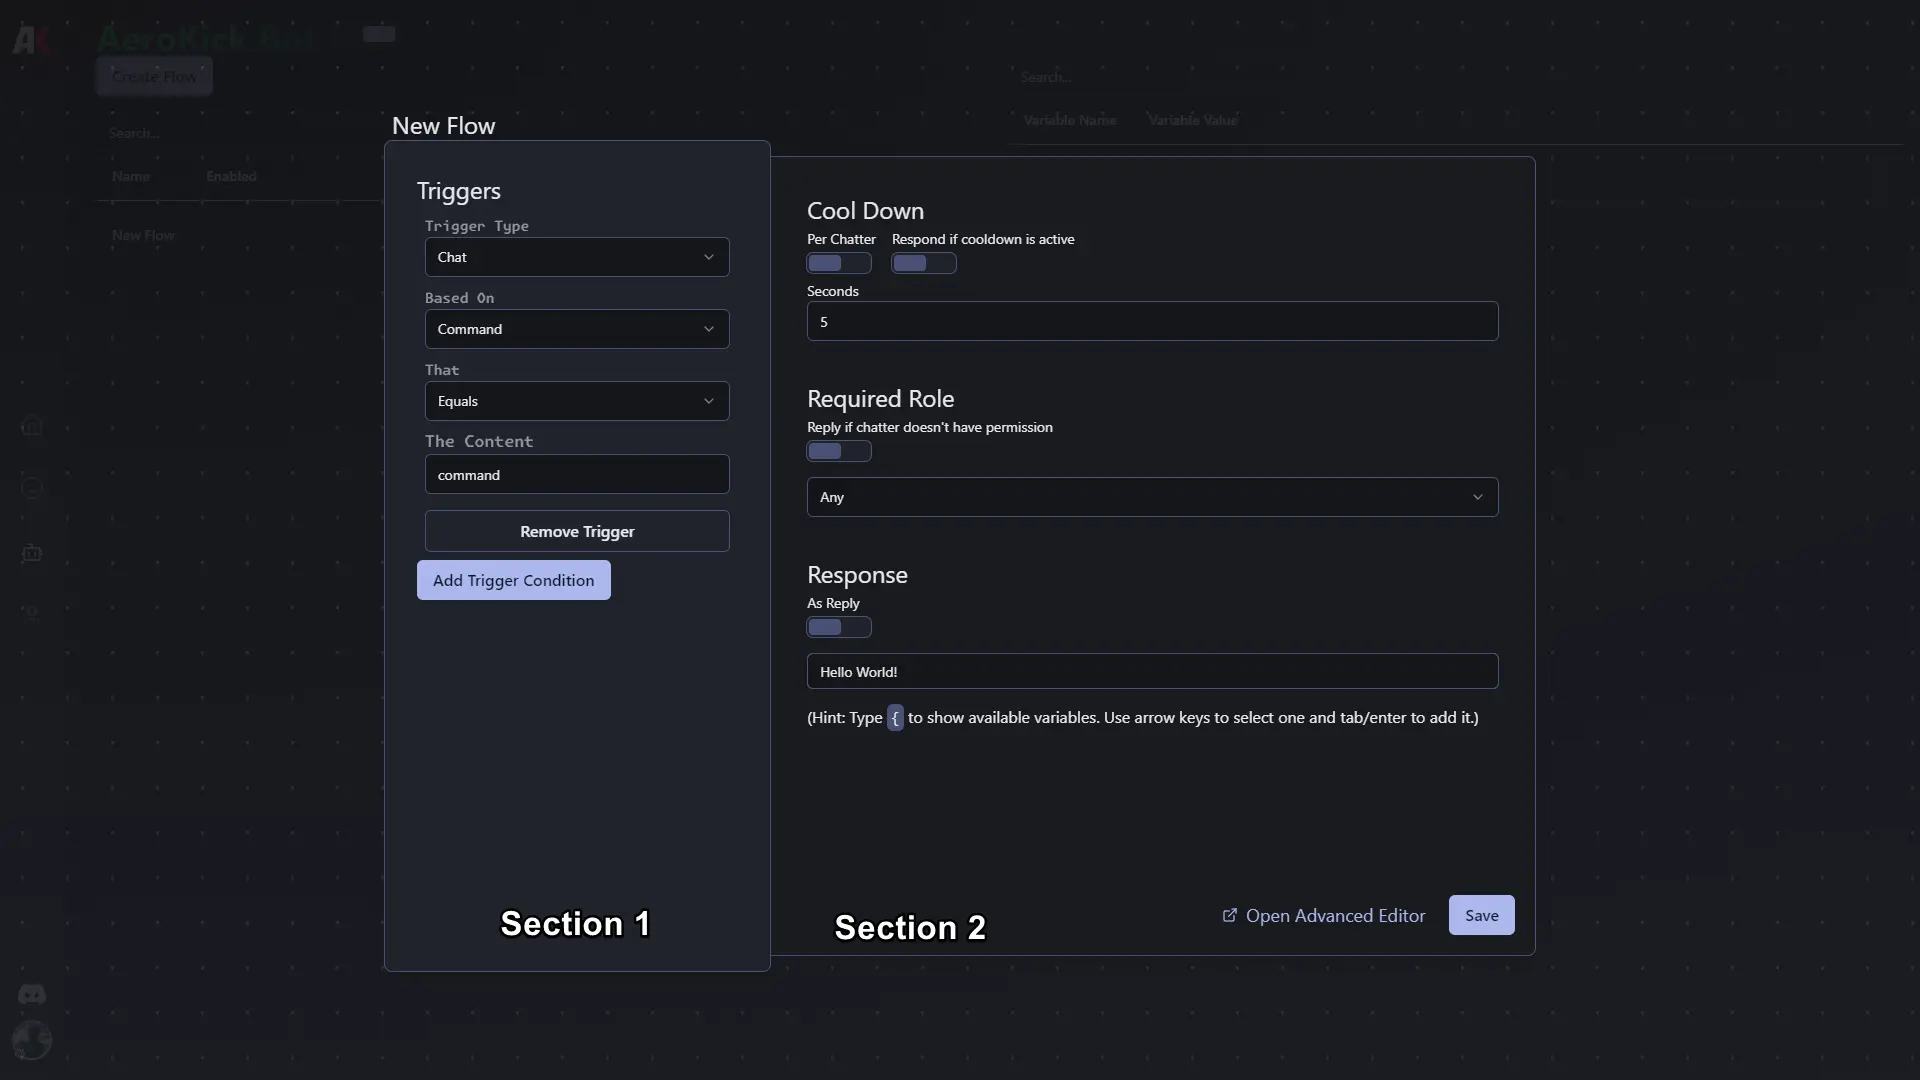
Section 1, otherwise known as the Triggers section is where you are able to add, remove, or change the different Triggers that will cause your Flow to run. By default, the Basic Editor will have a single Trigger, the Chat trigger. This Trigger will be set up by default to activate if the incoming message Command is !command.
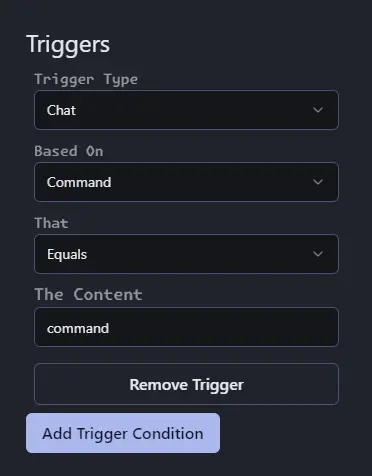 For the sake of this tutorial, let’s change the input labeled
 The Content to hug, this will make the Flow activate whenever the command !hug is sent in chat.
Section 2
Section 2 of the Basic Editor is known as the Action section. This is where you can configure what happens when the Flow is ran.
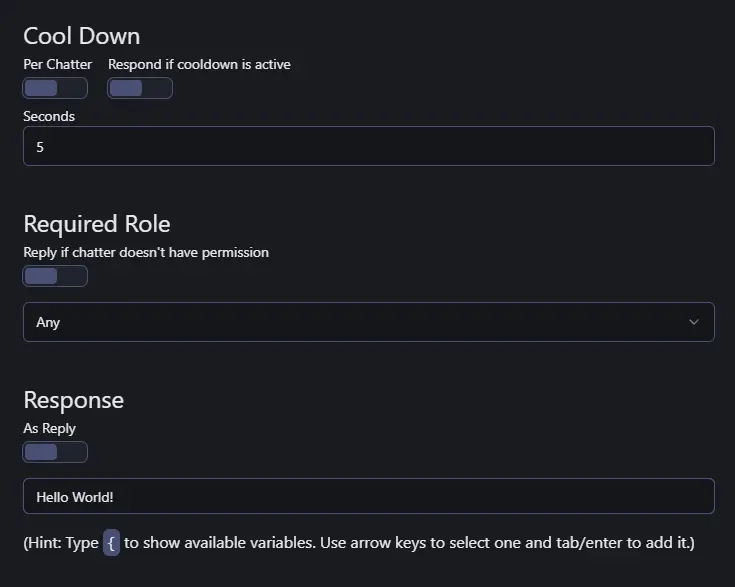 As you can see in the above image, a default Flow has the following settings: A basic, global
 cooldown on the action of 5 seconds, a Required Role check set to Any meaning anyone in chat can trigger the Flow, and a Response set to Hello World!.
Let’s continue with the tutorial of making a !hug command.
Step 1: Cooldown
Let’s start by changing the cooldown a bit, for this example we’ll first change the Seconds to 30, and then go ahead and turn on the Per Chatter toggle. This will make the command usable once every 30 seconds, per chatter. This means that if a chatter uses the command, it will be on cooldown for 30 seconds, but other chatters will still be able to use the command. We’ll leave the Respond if cooldown is active toggle off for now, you’re welcome to turn it on if you would like to!

Step 2: Required Role
We’re going to skip over the Required Role section, as we want anyone to be able to use this command, and that is the default setting.
Step 3: Response
Finally, it’s time to change the Response section. For this example we will leave the As Reply toggle turned off, as we want this message to be posted to chat normally, and not as a reply to the command message. Now it’s time to get to the response message. Go ahead and delete the Hello World text, and type @{target.name}, @{sender.name} gave you a hug!. You may notice that when you typed in the { character, a dropdown appeared. This is the Variables dropdown, and it allows you to insert variables into your response. For this example we used the target.name and sender.name variables. These variables will be replaced with the name of the target of the command, and the name of the person who triggered the Flow. The variables dropdown will show you all available variables. You’re welcome to scroll through it and see everything that is available!

Step 4: Trying it all out!
Now that we have our Flow configured, let’s go ahead and try it out! Head over to your chat on Kick, and send the message !hug. You should see a message similar to the following:
 You may notice that the response has your username in it twice, this is because we used
 {target.name}, but didn’t provide a target when running the command in chat. Let’s try that again, head back to your chat and send the message !hug @AeroKick. You should see a message similar to the following:
 And that’s it! You’ve successfully created your first Flow using the Basic Editor!
Next we’re going to take a look at the different types of Triggers that are available to you, and how to use them!