Getting Started
Welcome to the AeroKick Bot documentation! Let’s get you up to speed with everything you’ll need to know!
The Basics
At a very basic level, the AeroKick chat bot is very similar to most other cloud or local chat bot systems. However, there are some key differences. Let’s go over those differences before moving on.
Commands
Commands, we all know what commands are. However when it comes to the AeroKick Bot, we want to get the concept of Commands out of your head a bit. The AeroKick Bot works on a slightly different system. If you’re coming from another bot you may be used to being able to go to a commands tab and adding a !command and a response. While in general you can still do the same thing with the AK Bot, things work a little differently. As opposed to everything in the bot being broken up into it’s own systems, IE Commands, Timers, Events, etc... the AK Bot merges all of these concepts into 1 single system called Flows.
Flows
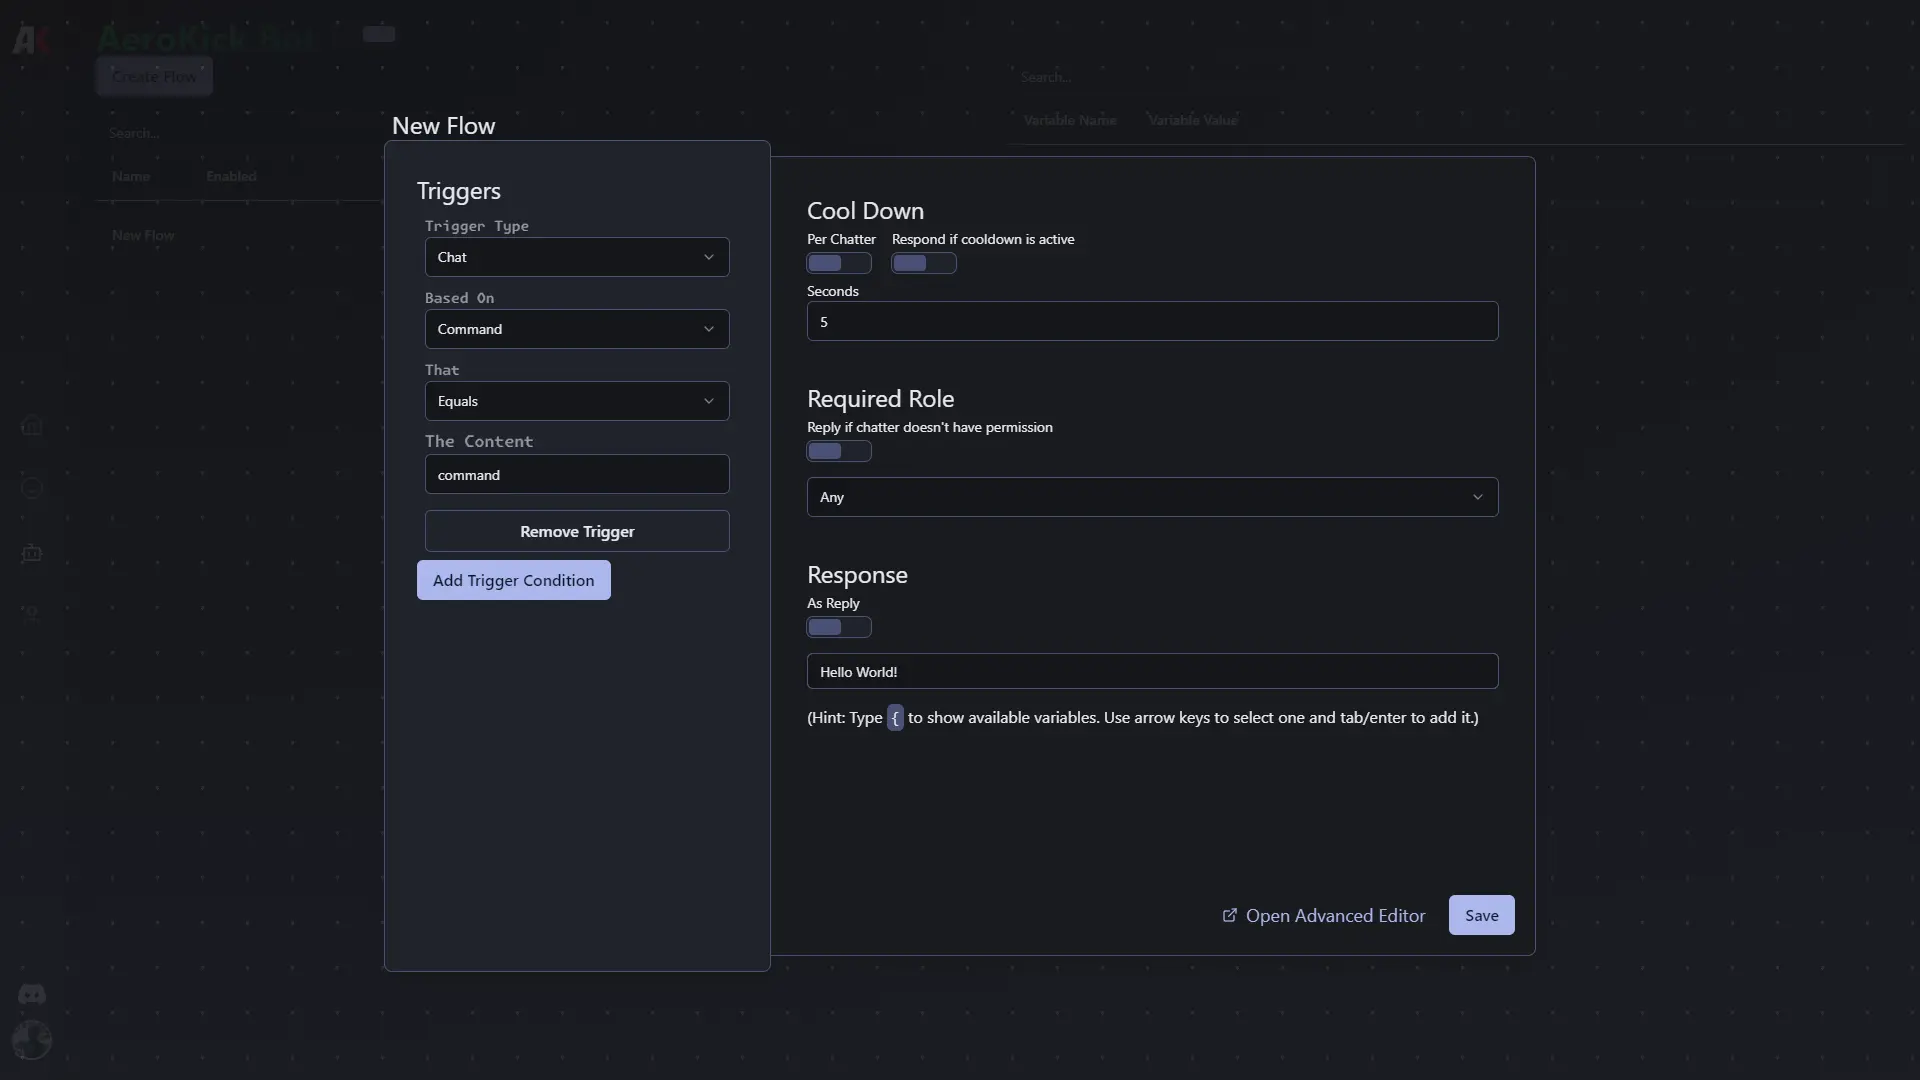
Flows are, in essense a list of Triggers and a list of Steps. Triggers can be almost anything, from a basic chat message, to follow events, even WebHooks for Stream Deck buttons. When a Trigger is… well, triggered, it will cause the Steps in the Flow to run. By default when creating a new Flow, and using the Basic Editor the steps that are ran are as follows:
Cool Down -> Role Check -> Text -> Send
This ultimately boils down to a basic Command. as an example here is what the Basic Editor looks like for a newly created Flow.

If this was a bit too much information all at once, that’s okay! We’ll go over things in better detail over the next few sections.
Now lets take a look at the Basic Editor, this is the simplest way to create a vast majority of the Flows you will ever need! However, if you are looking to make some more advanced Flows, you are welcome to skip to the Advanced section.